Page 1 of 1
how to paint a checkerboard effect?
Posted: Mon Dec 10, 2012 5:00 am
by DixonCider
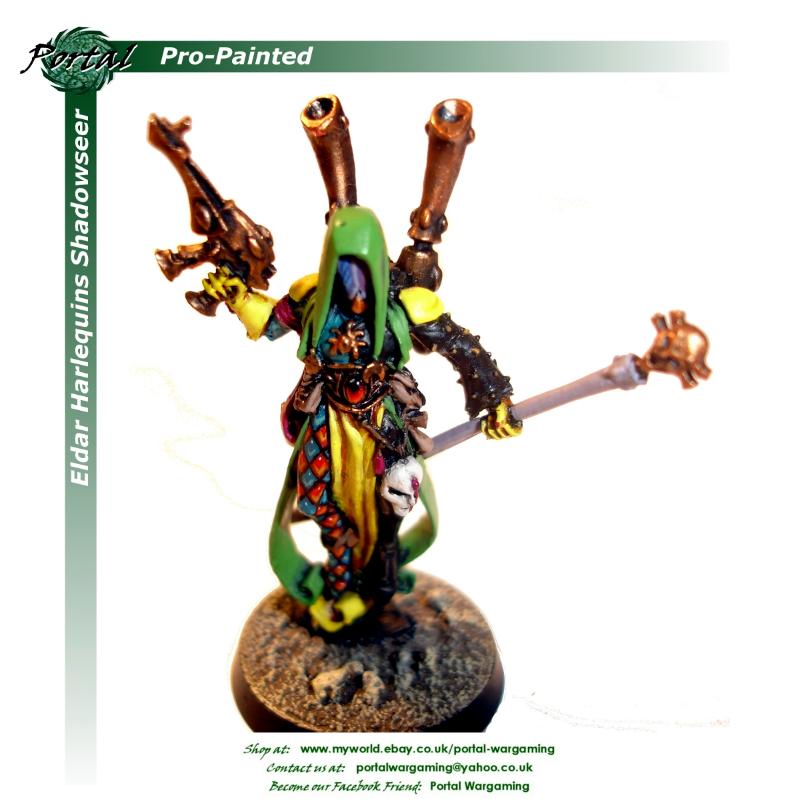
I am looking at painting a checkerboard effect, similar to the below image. In talking to my local painting gurus they were saying paint my green base then pencil the lines in and add in the purple on top. Any other helpful hints in doing this?
Re: how to paint a checkerboard effect?
Posted: Mon Dec 10, 2012 5:42 am
by Steam Ball
Pretty much that, but what about painting last the color that covers best? That way you can thin the paint to get smooth results and not go insane having to repaint it ten times, maybe 2-3 layers at worst case. Do a test on a cardboard of what covers better, thinned purple over green, or thinned green over purple.
The rest will be patience and a big & sharp brush.
Re: how to paint a checkerboard effect?
Posted: Mon Dec 10, 2012 5:46 am
by DixonCider
Awesome thanks. I am watching a video on you tube where they are saying not to use primer(gah?!), paint the lines with a thin black brush and fill in the squares. Final result looks good, but not sure I can live in a world where primer isn't used.
http://www.youtube.com/watch?v=QgqArgssEkg
Re: how to paint a checkerboard effect?
Posted: Mon Dec 10, 2012 11:23 am
by the solitaire
I do recommend to primer the miniatures first, then apply the lighter colour (if you´re going with green and purple, best start with green)
The way I paint checkers is to first paint a grid in semi-thin lines, roughly outlining the final checkered pattern.
Next fill in the bright squares (green) and if you want some gradient in there do the gradient in green first.
It´s not really a problem when you misplace a brush stroke at this stage. Just make sure that the areas that will form your green squares are good.
Next, outline the purple squares. You will most likely not hold your brush perfectly perpendicular to the surface. Make sure that when you lean the brush, you lean it towards the inside of the purple square, gently pushing the hairs of the brush along the outer perimeter of that purple square.
This will involve a lot of twisting and turning your miniature until you have the checkers painted, but to me it´s the most controlled way of painting checkers.
Re: how to paint a checkerboard effect?
Posted: Mon Dec 10, 2012 11:35 am
by Penwaaagh
Looks like they painted a grid first, easier with watered down black, then fill in the gaps and highlight, then re black line it
Re: how to paint a checkerboard effect?
Posted: Mon Dec 10, 2012 3:29 pm
by DixonCider
thank you very much. tonight I will be giving this a go. a little nervous, but will post results

side note: it is great to have a community so willing to help. refreshing after being part of some of the collectable gaming communities
Re: how to paint a checkerboard effect?
Posted: Mon Dec 10, 2012 7:35 pm
by velvet mark
Good luck with it!
As its been mentioned use thin layers and start with the lighter colour first.
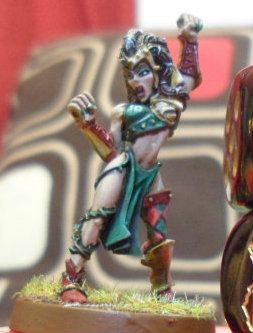
I did this to one of my witch elves. Its not perfect but it looks alright. I started with one diamond and built on that, rather than drawing the lines out. There were alot of straps etc round the back of the leg so I didnt bother with a full grid.
Re: how to paint a checkerboard effect?
Posted: Mon Dec 10, 2012 7:48 pm
by DixonCider
very cool. 5 hours and I will be at home and giving this a go