Classic Dungeonbowl pitch. Moor pitch Feb 18th 2013

A forum for football mini's talk.......painting, converting etc. etc. or showing off great accessories that make playing the game easier, cooler or more fun.

Moderator: TFF Mods

Post Reply
User avatar
the solitaire
Star Player
Star Player
Posts: 530
Joined: Sun Mar 21, 2010 8:59 am
Location: germany

Re: Classic Dungeonbowl pitch 1st tile (updated Dec. 6th

Post by the solitaire »

Here´s another tutorial:

How to make walls:

What you need:
-lots of styrofoam
-sharp xacto knife
-ballpoint
-screwdriver or similar tool (keep reading to find out more)
-lots of time


...-patience

Step 1) cut the wall segments to the desired size (since I already posted the floor tile tutorial Ill keep this short. Make sure the xacto knife is sharp though :wink: )

Image

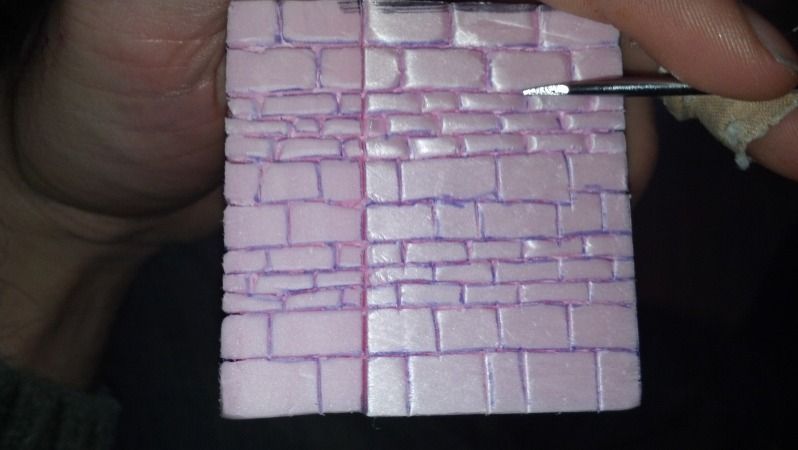
Step 2) draw the desired arrangements of bricks on the wall segments

I use one wall segment I made as "ruler" for the brick arrangement. I copy the height of the bricks to each corner of the wall segment, then fill in the rest of the wall

Image

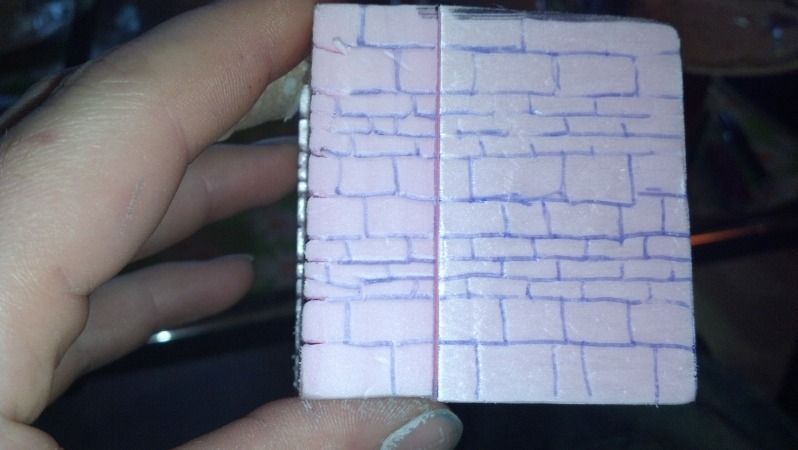
Route 1) use the ballpoint to trace the bricks several times using light to moderate pressure to get the desired depth. Once the desired profile is there, you´re ready to start painting.

(Since this method kept killing ballpoints and my girlfriend told me this ballpoint is the last I have for the project I decided to leave this route and opt for route 2)

Route 2)
Step 3) Use the xacto knife to trace the ballpoint markings (bricks)

You don´t need to cut deep. About 2-3mm is more then enough.

Image

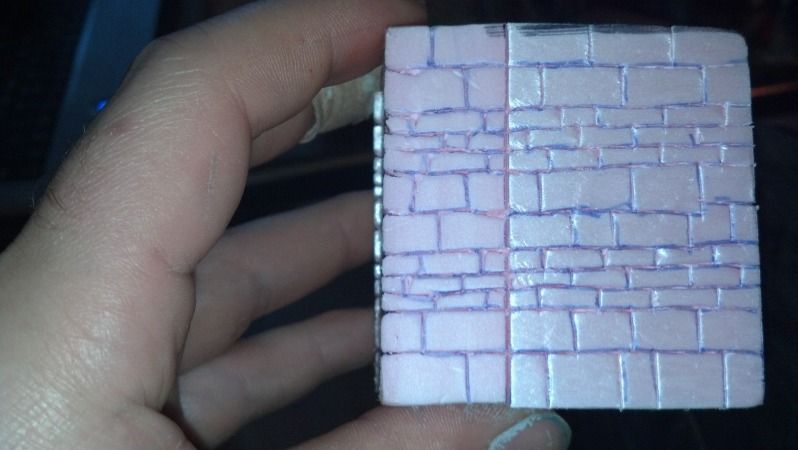
Step 4) Trace the bricks with the screwdriver (or similar tool) to widen the gaps between the bricks. You can also use the screwdriver to press single bricks in the wall a bit into the styrofoam to get a more irregular surface

Image

After this you´re ready for painting!

Image

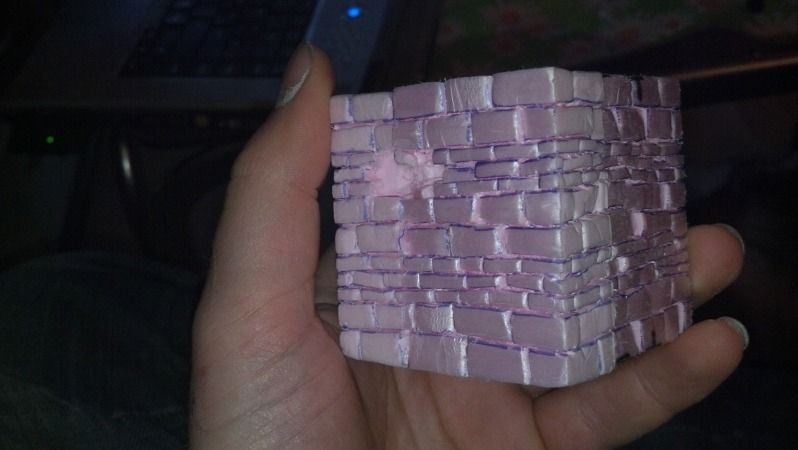
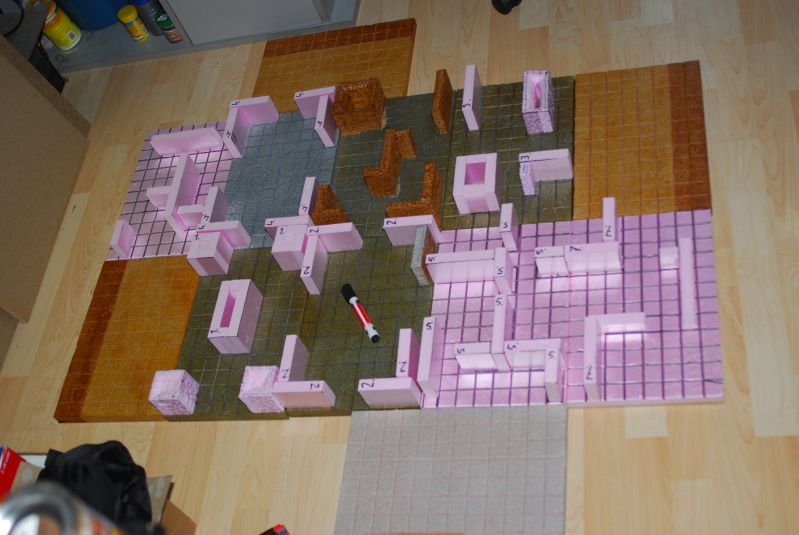
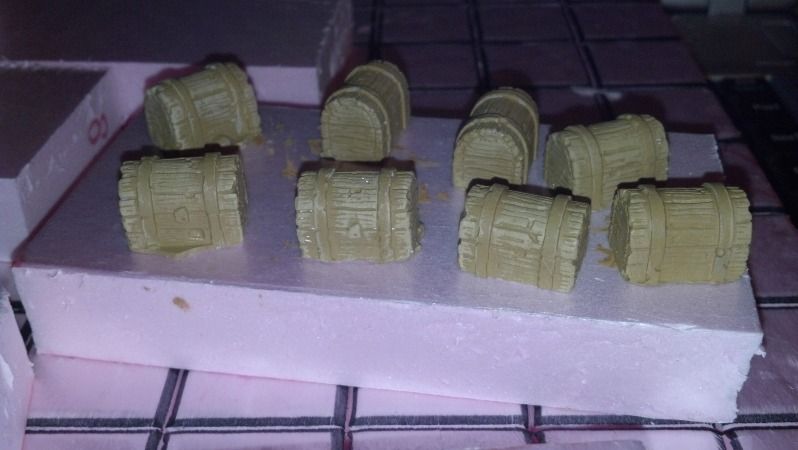
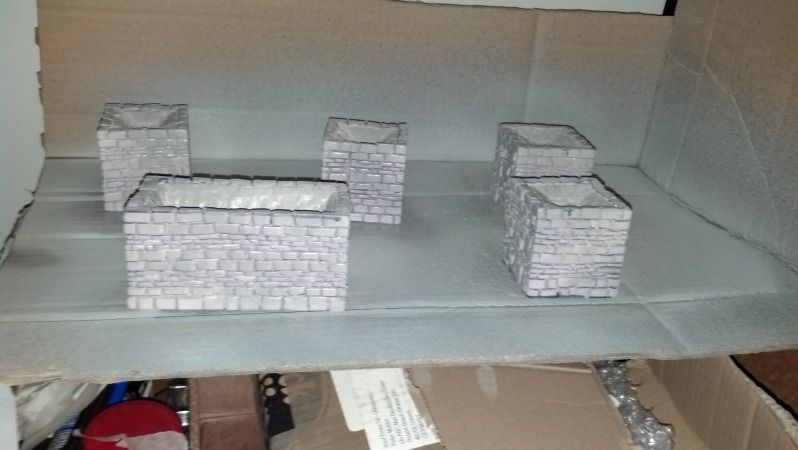
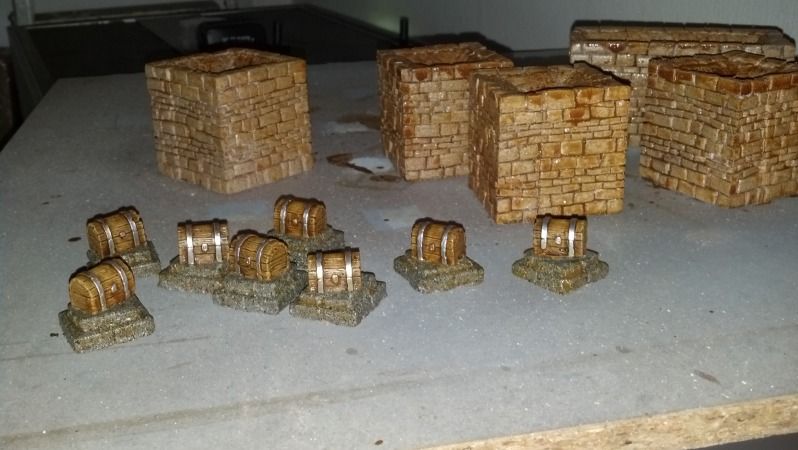
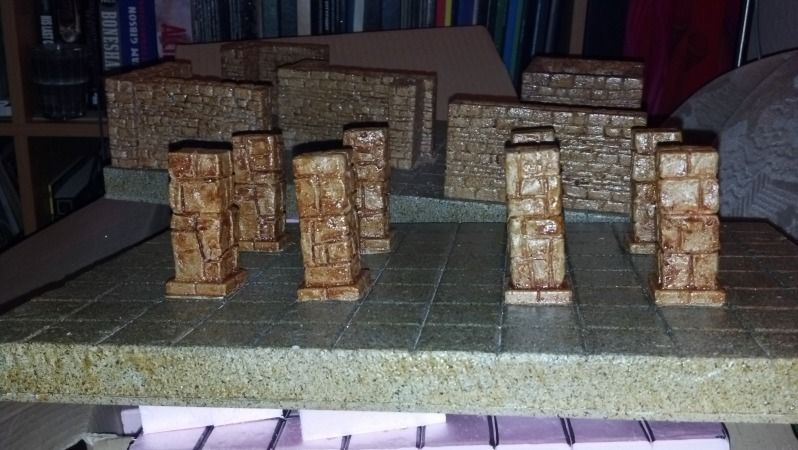
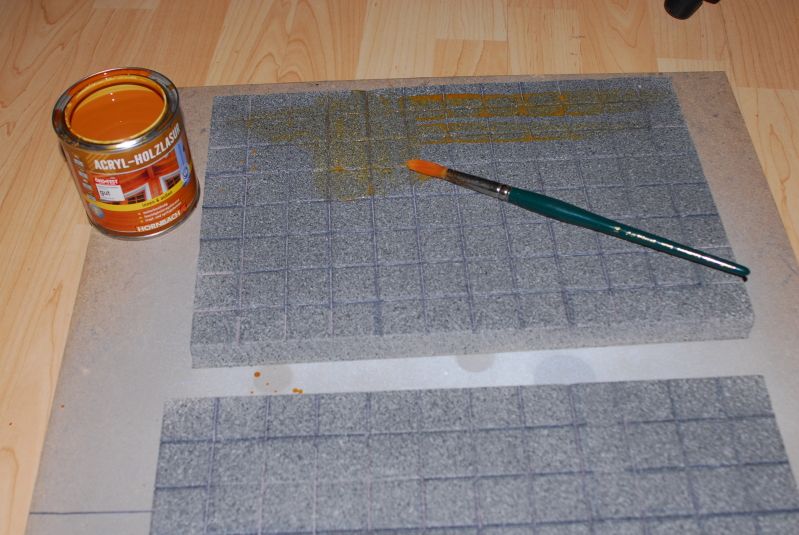
Slow progress on the walls, but the floor tiles are coming along nicely

Image
Image

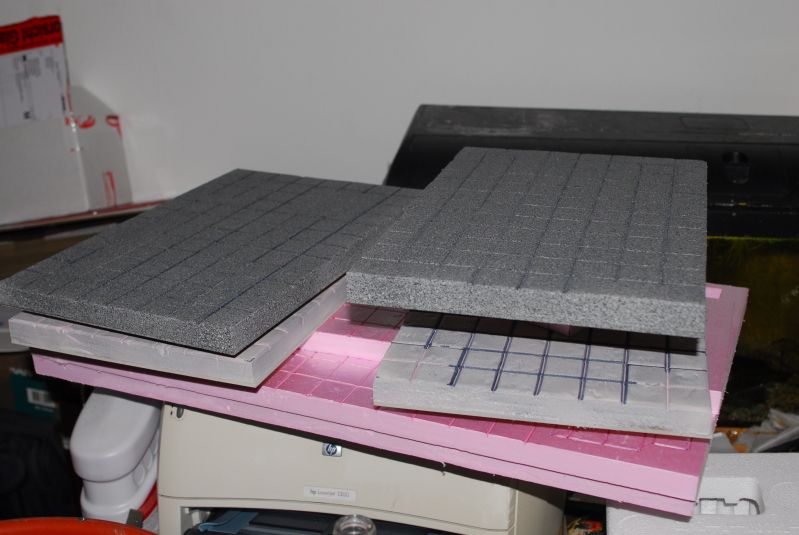
Here´s an image of a dungeon tile and an endzone tile for comparison:

Image

Reason: ''
If you can´t fix it with a hammer, you have an electric problem
Steam Ball
Super Star
Super Star
Posts: 977
Joined: Mon Nov 01, 2010 6:21 pm

Re: Classic Dungeonbowl pitch new tutorial: Walls! Dec. 9th

Post by Steam Ball »

Other methods to engrave those foam sheets are felt pens (many inks eat them, no pressure needed), brush and some disolvent (same principle), or low power soldering iron or pyroengraver. For more regular bricks, get some (metal, if possible) profiles of the appropiate rectangular size and press so you get one brick at a time. Or build them from tubes, by hammering until getting the squarish shape.

The spray is a great discovery, I never tought it would work at this scale.

Reason: ''
User avatar
the solitaire
Star Player
Star Player
Posts: 530
Joined: Sun Mar 21, 2010 8:59 am
Location: germany

Re: Classic Dungeonbowl pitch new tutorial: Walls! Dec. 9th

Post by the solitaire »

Thnx, didn´t think about the felt pens. They would be worth a try, even though the bricks would become rather sharp edged compared to the nice rounded edges I have now.

I tried the soldering iron but will reserve that for bigger projects. It´s a hit & miss thing for me.

I also wasn´t sure whether or not the spray would work but I wanted to give it a try.
As the project progresses and I get more and more done every day, I really start to like the effect better. I think I´ll still pick up a brush and highlight the bricks in the walls, but I´m absolutely satisfied with the floor tiles.

After all is done, all detail is added and everything is in place I will buy some cans of matte varnish to dull down the shine on the tiles and walls.

For now I have 4 endzone tiles done (I´m considering whether or not I should add logo´s to the endzone tiles or not) and 4 of the dungeon floor tiles.

4 more floor tiles to go, and then of course lots of wall segments. I ran out of primer though, so I´ll have to make a run to the DIY store one of these days and get a 2nd can, which will then cover the rest of the dungeonbowl field.

The acrylic wood enamel btw is excellent too. It shades the indentations and 2 layers of the stuff greatly increase the rigidity of the styrofoam surface.

Reason: ''
If you can´t fix it with a hammer, you have an electric problem
User avatar
Axtklinge
Legend
Legend
Posts: 1948
Joined: Fri Apr 16, 2004 2:08 am
Location: Porto, Portugal
Contact:

Re: Classic Dungeonbowl pitch new tutorial: Walls! Dec. 9th

Post by Axtklinge »

How're you planning to do the logo in the endzones?
It might 'cheer up' the endzones a bit, since there wont be any walls, on it.
You might even do them in different tones.

BTW you did 4 of them to have 4 player games, or because you wanted to try out different stuff in them?
Three/four player games sounds like a ton of fun (and possibly a endless game too).
:orc:

If you can spare the time, perhaps you could have a pic or two of all the stuff together (painted and not), so we can have a general view of how its going, and the size of it.
Cheers!
A.

Reason: ''
User avatar
the solitaire
Star Player
Star Player
Posts: 530
Joined: Sun Mar 21, 2010 8:59 am
Location: germany

Re: Classic Dungeonbowl pitch new tutorial: Walls! Dec. 9th

Post by the solitaire »

Ok, here´s a picture of the tiles placed together in one of many possible arrangements

Image

This arrangement has 2 endzone tiles for a classic game of Dungeonbowl.

The permanent marker was added for size reference

And here´s a picture of all the tiles, including the two additional endzones.

Image

I already had to additional endzones in the printed version of the dungeonbowl tiles. 4 player games of Dungeonbowl are chaotic, pretty quick and of course double the fun compared to a "mano a mano" game of Dungeonbowl. :D

If I decide to paint a logo in the endzone (the last two differently coloured rows) I will do something very similar to the classic dungeonbowl endzone tiles. The text DungeonBowl (same font most likely) and a spiked ball left and right of that.

As far as size is concerned, the arrangements above are:

72cm x 120cm (28,5"x48") for the 10 tile version
120cm x 120cm (48"x48") for the 4 player dungeon

The tiles are 24x36cm (9,5"x14,2").

The original Dungeonbowl game board consists of 6 dungeon tiles and 2 endzones (the original tiles were 20% smaller with a 25mmx25mm (1"x1") grid. I prefer a 30mmx30mm (1,18"x1,18") grid due to the big guys and their 40mm bases)

My Dungeonbowl game board consists of 8 dungeon tiles and 4 endzones

The two added endzone tiles are for 4 player games. The two added dungeon tiles were added as an afterthought because I have the materials needed to make them and because I have the space to store them in the case I´ll build later on for this game board.

Reason: ''
If you can´t fix it with a hammer, you have an electric problem
User avatar
Axtklinge
Legend
Legend
Posts: 1948
Joined: Fri Apr 16, 2004 2:08 am
Location: Porto, Portugal
Contact:

Re: Classic Dungeonbowl pitch more WIP pictures Dec. 11th

Post by Axtklinge »

Its looking great!
If it wasn't for the storage space I'd be so into building one of those myself...
I've played DB several times before but never in a 3D dungeon, and I bet its a completely different game!
:orc:

Have you given any more thought to the "2nd level" passages for your dungeon?

Reason: ''
User avatar
the solitaire
Star Player
Star Player
Posts: 530
Joined: Sun Mar 21, 2010 8:59 am
Location: germany

Re: Classic Dungeonbowl pitch more WIP pictures Dec. 11th

Post by the solitaire »

For the time being I decided to focus on the work at hand, which is the 12 dungeon tiles and a regular bloodbowl pitch as well as getting my Chaos team and some of the Lizardmen painted before Dec. 30th.

Other then that I have a 2nd edition Human team, a bunch of BB Ogres and some Goblins on the way to make up and/or complete another few teams.

I´ll give that upper level more thought once I have the main tiles finished though. I still like the idea.

Reason: ''
If you can´t fix it with a hammer, you have an electric problem
User avatar
the solitaire
Star Player
Star Player
Posts: 530
Joined: Sun Mar 21, 2010 8:59 am
Location: germany

Re: Classic Dungeonbowl pitch more WIP pictures Dec. 11th

Post by the solitaire »

Pillars and chests showed up this morning.

I made some progress on them:

Basecoat:

Image

And this is what they look like with a layer of enamel:

Image

I decided to place the chests on a 1"x1" tile.

Image

Chests in progress:

Image

Some more wall segments finished:

Image

Reason: ''
If you can´t fix it with a hammer, you have an electric problem
User avatar
velvet mark
Veteran
Veteran
Posts: 245
Joined: Mon Jul 30, 2012 5:27 pm
Location: Manchester, UK
Contact:

Re: Classic Dungeonbowl pitch Treasure Chests Dec. 15th

Post by velvet mark »

The pitch is coming on and looking great!

What are the chests made of? Plaster?

Reason: ''
Image
User avatar
the solitaire
Star Player
Star Player
Posts: 530
Joined: Sun Mar 21, 2010 8:59 am
Location: germany

Re: Classic Dungeonbowl pitch Treasure Chests Dec. 15th

Post by the solitaire »

Yep, bought them through eBay. I´m happy with the amount of detail on them. Will post more pics tomorrow, when I have the chests done and attached to their bases.

The idea is to paint the "nothing" and ball markers underneath the bases I glue the chests on, so you can place the chests in the dungeon and look underneath them to see whether the chest you found contains the ball or not.

Reason: ''
If you can´t fix it with a hammer, you have an electric problem
Steam Ball
Super Star
Super Star
Posts: 977
Joined: Mon Nov 01, 2010 6:21 pm

Re: Classic Dungeonbowl pitch Treasure Chests Dec. 15th

Post by Steam Ball »

People will learn the paint differences and go for the chest with the ball. ;)

Reason: ''
Stout Youngblood
Super Star
Super Star
Posts: 1170
Joined: Thu Jan 01, 1970 12:00 am
Location: The Twilight Zone
Contact:

Re: Classic Dungeonbowl pitch Treasure Chests Dec. 15th

Post by Stout Youngblood »

Those chests are made from Hirst Arts molds. They are great. The one the chest is from is #85 Cavern Assessory.
Image

Image

For only $34 I found it a great investment for dungeonbowl, streetbowl and for the sidelines.

Reason: ''
Runejack
Rookie
Rookie
Posts: 35
Joined: Sun May 15, 2011 12:46 pm

Re: Classic Dungeonbowl pitch Treasure Chests Dec. 15th

Post by Runejack »

Steam Ball wrote:People will learn the paint differences and go for the chest with the ball. ;)
I'm attempting a Dungeonbowl board as well and was struggling with this issue. I was thinking it might work to put blu-tac on some laminated counters after shuffling them a bit and then sticking them to the bottom of the chests. This way the one with the ball won't always be the same.

Joel

Reason: ''
Steam Ball
Super Star
Super Star
Posts: 977
Joined: Mon Nov 01, 2010 6:21 pm

Re: Classic Dungeonbowl pitch Treasure Chests Dec. 15th

Post by Steam Ball »

There is always the old "pick blindly from bag/box full of tokens", one color for "ball", other for "boom".

But printed markers is a good idea for people who prefer "spicing" the board. You can use magnets and metal tokens or magnetic sheet (sold for basing among other things), instead of blutak. Or plastic square bases with something metallic (or the magnet, and the metal thing in the chest) and different marks painted on the underside. All this assuming the chest can be drilled easily or has some kind hole below already.

Also, some brands sell chests that can be opened, so you just put things inside.

Reason: ''
User avatar
the solitaire
Star Player
Star Player
Posts: 530
Joined: Sun Mar 21, 2010 8:59 am
Location: germany

Re: Classic Dungeonbowl pitch Treasure Chests Dec. 15th

Post by the solitaire »

Steam Ball wrote:People will learn the paint differences and go for the chest with the ball. ;)

True, thought of that last evening, after I replied.

I still have the original Dungeonbowl tokens and think I´ll prefer the "pick from bag" method, like in the original Dungeonbowl rules.

Chests:

Image

Pillars:

Image

With a little luck I´ll be able to glue another 2 dungeon tiles together this week.

That leaves 5 to go. 3 of the original ones, and the 2 additional tiles I made up myself. I´ll focus on getting the tiles corresponding to the original Dungeonbowl game finished first.

Reason: ''
If you can´t fix it with a hammer, you have an electric problem
Post Reply